Creating A Family Free using GEDCOM
A broad category of how genai is useful is by turning unstructured data into structured. Creating a family tree (GEDCOM format) is a good example of that: I gave it stream of consciousness collection of details about who is who (this person is so-and-so's kid...) and asked for gedcom format.
Then I imported the gedcom file into https://www.familyecho.com/ and then exported to pdf and printed.
Analysis on my ChatGPT data
I did an initial analysis of my ChatGPT history export. Here's a surface-level, first-pass analysis:
Content Types
Most messages are text, with assistant messages also including code, thinking, and reasoning_recap. User messages are primarily text, with a small amount of multimodal_text.
Conversation Length
Some conversations are significantly longer (e.g., "Genkit to Gemini Refactor" has the most messages).
Message Length (Word Count)
Assistant messages: ~236 words on average.
User messages: ~222 words on average, but with high variability, including some very long inputs.
Temporal Trends (Monthly Aggregations)
The data spans Feb 2023 to May 2025. I tracked metrics like average words per conversation, messages per month, TTR, and subjectivity/objectivity over this period, revealing fluctuations and trends in language style.
User messages show varying monthly averages for word count, TTR, and subjectivity.
Next Steps
The goal is to track the quality of GPT responses over time, which I haven't achieved yet. To do this, I plan to use LLM-based evaluation for quality assessment.
This analysis provided a baseline for understanding message patterns and trends, but further refinement is needed to track the quality of assistant responses effectively.
Writing
Published an article with AI Predictions between now and may 2026.
I also published as an unlisted article, a deadpan satirical composition, Acting without Acting by Jason Alexander. I think it is pretty funny: Best part is chapters 7-10. Other parts I think are especially entertaining are the prologue, intro, chapter 1, the excercises, and the two stories (vapor and stillness). An acquaintance said it was slop but I think it is high quality slop, and that it has my tongue in cheek sense of humor.
I am also writing a corporate blog post on Agentspace, coming soon.
Finally, I am thinking I will write a series of posts with some business ideas and implementation ideas I have been kicking around.
QR Codes in Your Document, Fast and Painless!
My fiancé’s neighbor has a dog that won’t stop barking. So I wrote a little letter suggesting they invest in some Amazon products that might help with that.
At a technical level, I wanted to add QR codes to a letter without having to go to a website, generate each one, save each one, and drag each one to my doc— I needed to slide a letter under my neighbor's door with QR codes for specific product links, and I wanted a quicker way – ideally, to have the QR codes appear directly in the final printable output without all the manual steps. My goal was to spend maybe 10-20 minutes total.
Here's how I used my Cursor/FastMCP setup with Claude to do it:
1. The Custom Tool:
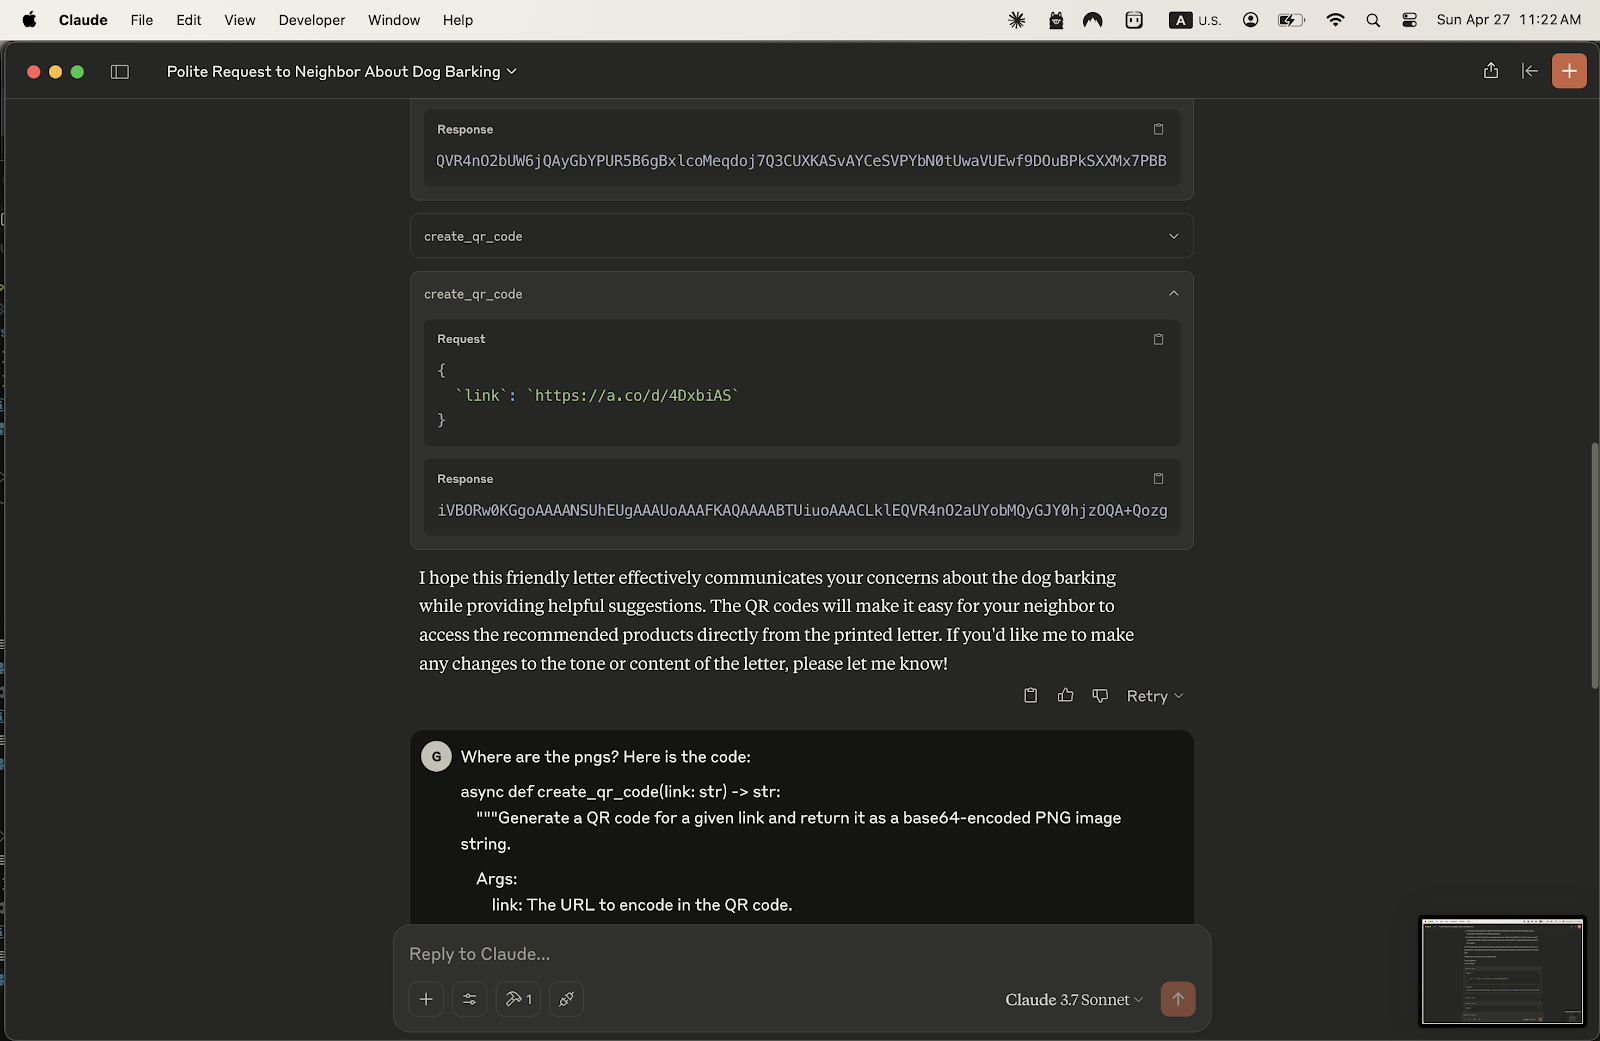
Using Cursor, I opened my FastMCP project. Already set up. I modified the place I keep Python tool's (server.py) to use the qrcode library. Cursor generated this code. This tool (create_qr_code) takes a web link and returns the QR code image encoded as a base64 string. (See code screenshot). This meant Claude now had a built-in way to generate the QR codes when I provided links.
2. Asking Claude for the Letter and Codes:
I wrote a prompt asking Claude to draft the letter and specifically requested it to "Create QR codes for each of these links," mentioning I planned to print it. (See prompt screenshot).

3. The Initial Result (and the fix):
Claude gave me the letter text, which was great. However, for the QR codes, it returned the raw base64 strings, not the visible images. (See response showing base64 strings). This wasn't quite what I needed for printing!

I simply told Claude I needed a printable version. This time, it generated the output as an HTML file, explaining that this format would correctly display the QR codes from the base64 strings. (See response explaining HTML).
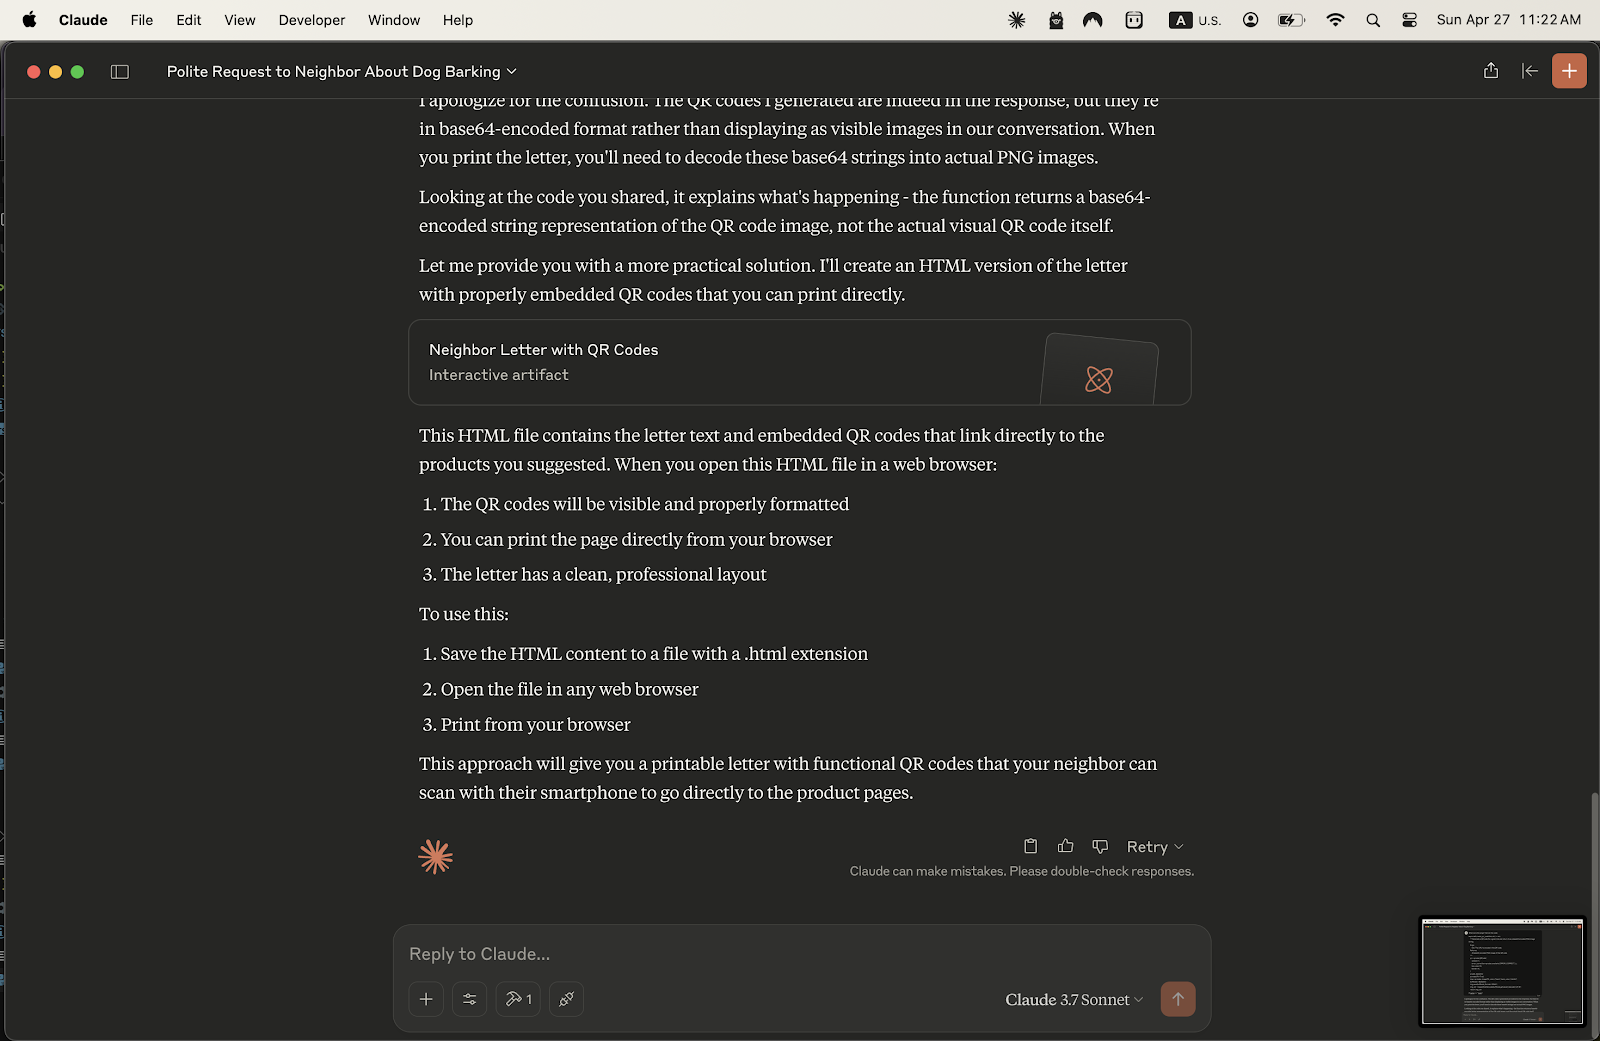

4. Printing the Final Document:
I saved the HTML file, opened it in my web browser, and there it was! The letter with the QR codes clearly visible and formatted. I just hit print,
The Takeaway:
Instead of generating QR codes one by one on an external site, saving images, and manually embedding them, I used my AI assistant (Claude) powered by a custom tool to handle the generation and embedding within the final document structure (HTML). This bypassed multiple steps and got me a ready-to-print letter with functional QR codes quickly and efficiently, staying well within my time limit.
Fixing an Incorrectly Resolved Git Rebase Conflict After a Force Push
Scenario
You resolved a rebase conflict, but did it wrong. You’ve already committed and force-pushed the branch to your remote (e.g., origin). Now you need to go back and fix the conflict correctly.
Step-by-Step Guide to Fixing the Conflict
1. Identify the Bad Commit
The first thing you need to do is identify the commit where the conflict was resolved incorrectly. You can do this by inspecting your commit history. Run the following command:
luagit log --oneline
Look for the commit message related to the conflict resolution and take note of the commit hash.
2. Create a Backup of Your Current Branch
Before making any changes to your history, it’s always a good idea to create a backup of the current branch just in case something goes wrong. You can do this by creating a new branch based on your current one:
cssgit checkout -b backup-branch
Now, you can safely make changes to the original branch, knowing you have a backup.
3. Use Interactive Rebase to Edit the Bad Commit
To go back and fix the conflict, you’ll use Git’s interactive rebase feature. This allows you to stop at a specific commit, fix it, and continue with the rest of your history.
Run the following command, replacing <commit-hash> with the hash of the commit just before the bad one:
cssgit rebase -i <commit-hash>^
When the interactive editor opens, you’ll see a list of your recent commits. Find the commit where the conflict was resolved incorrectly and mark it with edit.
4. Fix the Conflict
Once Git pauses the rebase on the bad commit, you can now fix the incorrectly resolved conflict. Start by checking out the file where the conflict happened and resolving it properly:
csharpgit checkout -- <file-with-incorrect-resolution>
After resolving the conflict correctly, add the file to the staging area:
csharpgit add <file-with-correct-resolution>
5. Amend the Commit
Now that the conflict is resolved correctly, you need to amend the commit. This will replace the previous, incorrect resolution with the correct one:
sqlgit commit --amend
6. Continue the Rebase
Once the commit is amended, continue the rebase process so that Git can apply the rest of your commits on top of the corrected one:
kotlingit rebase --continue
If there are no further issues, the rebase will complete successfully.
7. Force Push the Corrected Branch
Since you’ve already force-pushed the incorrect history to your remote branch, you’ll need to force push again to update the branch with the corrected history:
cssgit push --force
This command will overwrite the previous force-push with the updated commit history, including your correctly resolved conflict.
Final Thoughts
Interactive rebasing is a powerful tool that lets you safely fix mistakes, even after you’ve pushed them to a remote repository. The key here is to identify where things went wrong, backtrack using interactive rebase, fix the issue, and continue.
Remember, Git gives you the flexibility to rewrite history—but with great power comes great responsibility. Be cautious when force-pushing changes, especially if other collaborators are working on the same branch. Always communicate with your team to ensure everyone is on the same page.
By following these steps, you can confidently fix any incorrectly resolved conflicts and get back on track!